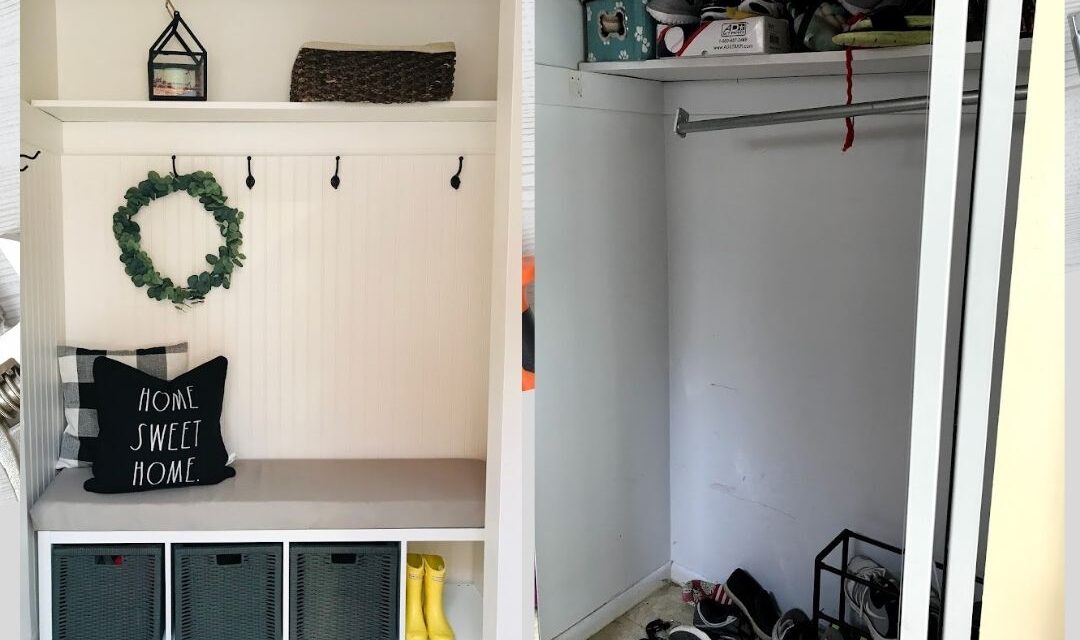
I have always wanted a mudroom so my kids had somewhere to hang their school bags and sit to put their shoes on. My DIY Mudroom makeover is probably my first big DIY project. A year ago, I didn’t even know how to use a drill. When you first walk into my house you there is a big storage closet, where I had opening mirrors, it was a little outdated and not too aesthetically pleasing. When I was cleaning out this closet I threw away and donated about 80% what was in that closet, there was so much stuff just stored there over the years that we just didn’t need.
I am so happy how this turned out, and I promise if I can do this, you got this!
Tools you will need:
- List of things you need:
- Beadboard panels
- MDF Pre-Finished White Quarter Round Moulding
- Liquid Nail Glue
- Wood filler
- Sander
- Nail Gun or Finishing Nails and hammer
- Utility Knife
- Spackle
- White Paint
- Kallax shelf
- Industrial Stapler
Extras and Decorations:
- Farmhouse hooks
- Baskets for storage
- Bins (from your favorite place) for shoes (I recommend standard 13″ bins for the bottom so you can swap them out anytime you decide to change your decor)
- Cushion (optional)
- 3in foam (Jo Ann fabrics)
- Fabric (Jo Ann fabrics)
- Measure out the Kallax for your cushion, I used extra bead board.


Plan:
The most important part of doing a project like this is the planning, you want to make sure that you have plan out properly and measure everything accurately, double check your measurements. You also want to make sure before you start that where you will be using the Kallax shelf as your bench that it measures properly and will fit.
After you measure everything you want to make sure that you write out a list of everything you need.
Demo Day: Bench:
- The first step with this project is to demo your closet. Remove doors, extra shelves and clean out all the clutter.
- You will need to remove the baseboards. This is fairly easy to do, just take a utility knife and cut along the baseboard. You can then use a hammer and gently pull off the baseboards. You only have to remove where needed.
- Our walls were pretty damaged so we had to a lot of drywall patches and spackling to do to fix the damage.
- You can spackle and then when the spackle is dry you can sand down that spot until it is smooth
- I already had a shelf in my closet so I didn’t need to build one, so I just measured from the top of the shelf to the ground so I could add the White MDF Bead-board Panel.
- I measured mine MDF Bead-board Panels exactly so when I went to Home Depot I had them cut the boards for me.
- Next use your nail gun to attach to attach boards. After the boards were attached, I added the MDF Pre-Finished White Quarter Round Molding. I added that to corners and the top of the bead boards with finishing nails. Once you attach the boards and the molding you can you use the wood filler to fill in the holes where you nailed in the nails.
- Once all this is done you can paint the molding and the bead boards.
